



Malivlies Stitch Bonding Machine Start-Up: A Seven-Step Guide

A Malivlies stitch bonding machine will produce saleable fabric on the first run if the start-up is done in order. The sequence below is the one our engineers follow at commissioning: prepare the beams, fix width and gauge, align the elements, set the pattern drive, thread and tension, set take-up and batching, then trial and lock the recipe.
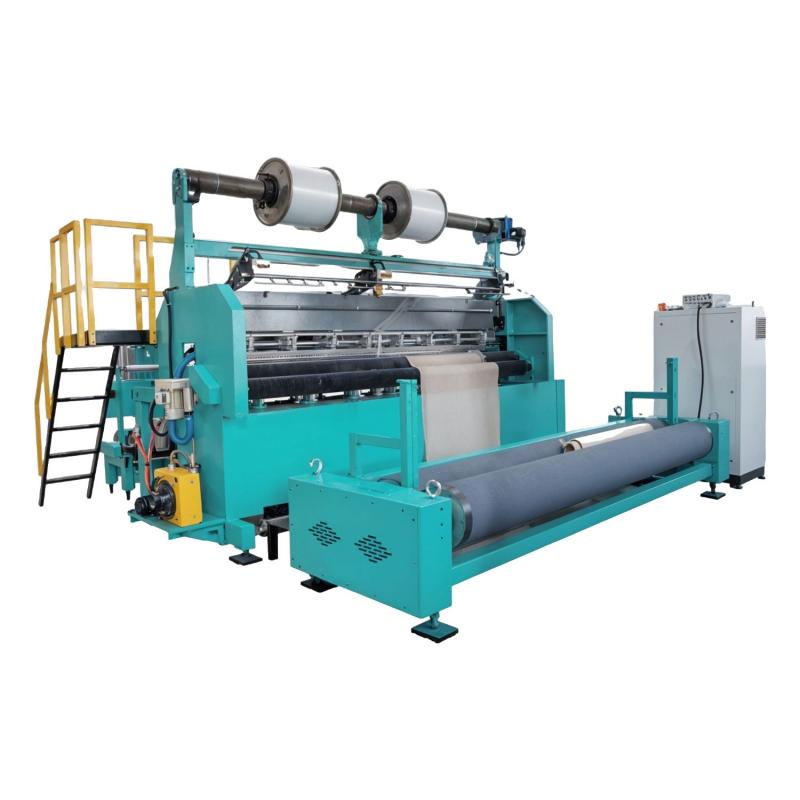
What the machine is doing, before you touch it
The line stitches a fibrous web into a stable fabric rather than entangling it or curing it. Because the strength is added mechanically by the stitch, many stitch-bonded recipes avoid chemical binders altogether, which takes cure time and its associated emissions out of the process. The output goes into stitch-bonded industrial fabrics, medical bandages, clothing interlining and curtain fabric.
Two systems carry the whole start-up. An integrated computer coordinates the main drive, yarn feeding and fabric take-up, and the operator works from a touch screen showing live data. The electrical side is a speed-regulated drive with power-failure safety and a single speed control through a frequency converter, with the main motor sized by width: 13 kW for 2000–4400 mm and 18 kW for 4400–6000 mm.
The seven steps
1. Prepare yarns and beams
Confirm yarn specification and beam build before anything is threaded. The frame takes one or two warp beam positions for sectional use, with a maximum flange diameter of 30. Clean creels and correct tension at this stage prevent most of the end breaks that would otherwise appear an hour into the run.
2. Fix working width and gauge
Match width to the order: 2000, 2800, 3600, 4400, 4800, 5400 or 6000 mm. Then choose gauge for hand, weight and throughput: F7, F12, F14, F16, F18, F20 or F22. These two choices shape the fabric more than any adjustment you will make later, which is why they come before threading rather than after a disappointing trial.
3. Verify the knitting elements
Install and align the compound needle bar, closing wire bar, knock-over sinker bar, supporting bar, counter-retaining bar and one or two ground guide bars. Alignment here decides stitch structure; misalignment shows up later as pattern drift that no tension change will fix.
4. Configure the pattern drive
Set motif and stitch density with the N-drive, pattern disc and integrated tempi change gear drive. A single pattern disc keeps setup straightforward. Start from your standard disc and adjust tempi towards target weight and handle rather than rebuilding the setup.
5. Thread and set the yarn let-off
The electronically controlled let-off runs on a geared motor with a frequency converter for precise tension. On sensitive programmes, specify the optional electronically controlled yarn stop motion; it halts the line on a yarn fault instead of letting a length of off-spec fabric reach the batch.
6. Set fabric take-up and batching
The electronically controlled take-up, also a geared motor with frequency converter, keeps winding stable. Standalone batching uses a friction drive with pressure roller up to a maximum batch diameter of 914 mm (36″), with a geared motor and integrated frequency converter for an even roll build.
7. Trial, inspect, lock
Start slow. Check edges, stitch stability and tension balance across the full width before speeding up. Read the touch screen, make small trims, then lock the settings. The trial-inspect-adjust loop is unglamorous and it is what separates a repeatable recipe from a machine that behaves differently on every shift.
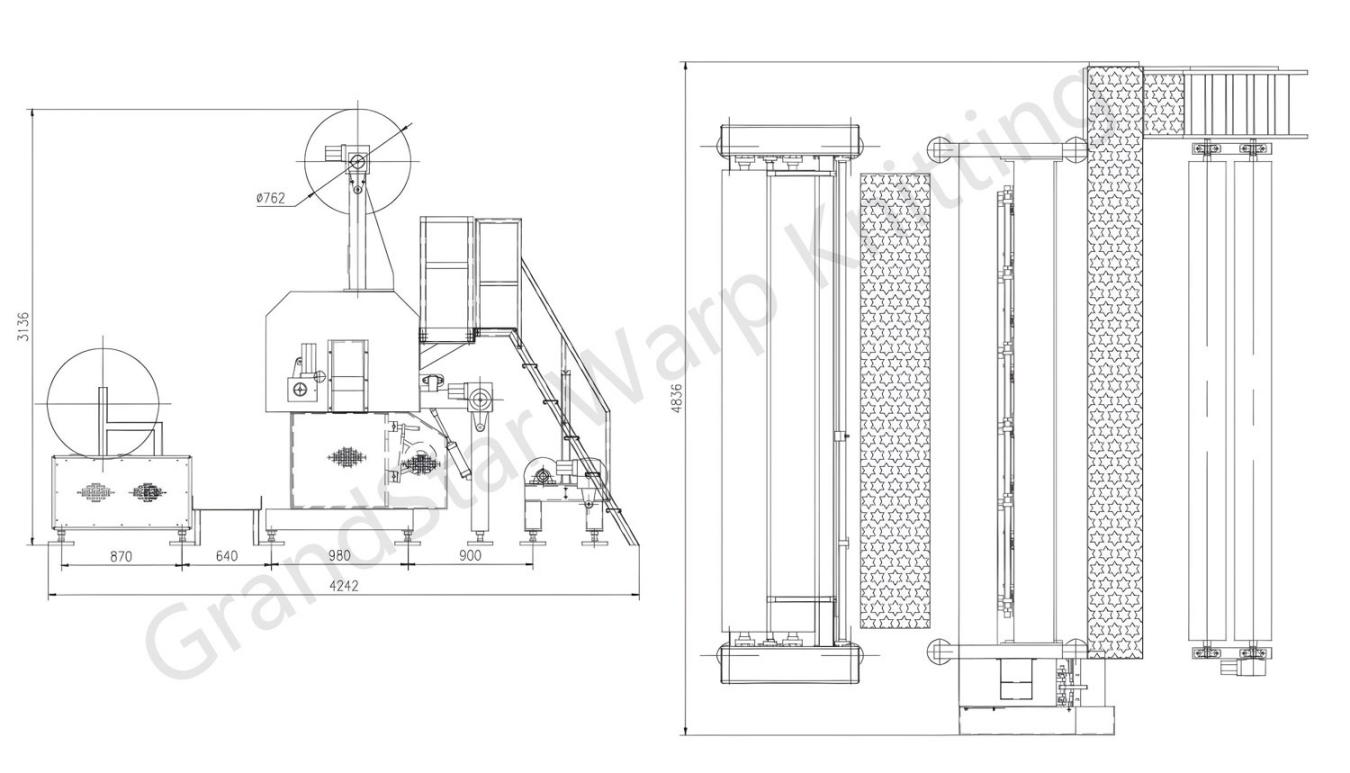
Quick reference parameters
| Item | Specification |
|---|---|
| Working widths | 2000, 2800, 3600, 4400, 4800, 5400, 6000 mm |
| Gauges | F7, F12, F14, F16, F18, F20, F22 |
| Pattern drive | N-drive with pattern disc, integrated tempi change gear, single pattern disc |
| Warp beam support | 1–2 positions, max flange Ø30 |
| Yarn let-off | Electronic drive, geared motor with frequency converter |
| Yarn stop motion | Electronic, optional |
| Fabric take-up | Electronic, geared motor with frequency converter |
| Batching | Standalone friction drive with pressure roller, max Ø914 mm (36″), geared motor with integrated frequency converter |
| Main motor | 13 kW for 2000–4400 mm; 18 kW for 4400–6000 mm |
The habit that shortens every changeover
Record the chosen gauge, tempi setting, yarn type and take-up speed on the route card for each product, not in an operator’s notebook. Teams that do this bring a repeat order back up in a fraction of the time and stop relying on whichever shift leader remembers the settings. It is the cheapest process improvement available on this machine.
As volume grows, the three levers that matter stay the same: width, gauge and pattern tempi. Hold tension with the electronic let-off and take-up, and add the optional yarn stop motion wherever the construction is delicate. Replacement elements are listed under compound needles for stitch bonding and guide needles; the wider needle family is covered in our warp knitting needle overview.
Training, service and neighbouring machines
Support runs on professional manuals, online guidance, a video library and on-site training tailored to your product mix, whether that is bandages, interlining or curtain fabric. In regions without a local team the first response is real-time online support, with engineers dispatched from the nearest hub when the work needs hands on it.
If your work uses yarn-stitched constructions rather than webs, compare with the Maliwatt machine and the Malimo machine before committing to a configuration. To plan a guided start-up, send your yarn or web details, target fabric weight and end use through our contact page; commercial terms and the wider group range are handled at grandstarcn.com.
Frequently Asked Questions
What is the correct start-up order for a Malivlies stitch bonding machine?
Prepare yarns and beams, fix working width and gauge, verify and align the knitting elements, configure the pattern drive, thread and set the yarn let-off, set fabric take-up and batching, then run a trial, inspect and lock the recipe. Doing it in that order avoids rework, because each step constrains the next.
Which widths and gauges are available?
Working widths of 2000, 2800, 3600, 4400, 4800, 5400 and 6000 mm, and gauges F7, F12, F14, F16, F18, F20 and F22. Width follows the order and the roll format; gauge follows the hand, weight and throughput you need.
How is fabric tension kept stable during a run?
The electronically controlled yarn let-off and fabric take-up both use geared motors with frequency converters, and an integrated computer coordinates them with the main drive. An optional electronically controlled yarn stop motion halts the line on a yarn fault for sensitive constructions.
What batch size can the machine wind?
The standalone batching device uses a friction drive with pressure roller and takes a maximum batch diameter of 914 mm (36 inches), driven by a geared motor with an integrated frequency converter for an even roll build.
How do we make repeat orders faster to set up?
Record the gauge, tempi setting, yarn type and take-up speed on the route card for each product rather than leaving them in an operator’s notebook. That single habit shortens changeovers and cuts scrap, because a repeat order starts from documented settings instead of from memory.

Hey, I’m Vincent!
Solving complex challenges with precision and creativity in the warp knitting industry. Passionate about advancing textile engineering and turning innovative ideas into reality. Shaping the future of warp knitting.


